Sunday, 14 October 2012

Fire Roasted Tomato Salsa

Hello All!!!
I have been doing so much cooking that I haven't had time to blog! Let me tell you, I have so much to share ya'll are going to flip! We have canned tons of salsa, tomato sauce, and apple sauce, we're stocked up for winter, or until I give it all away. If I haven't told you all this already I LOVE TO SHARE FOOD! If I had it my way I'd pack a whole plane with food and visit every hungry village in the world and give them food. When I see homeless I want to give them a good meal, when I see starving undergrads, I want to give them a good meal (or load them up with cookies which are just as good as a nice meal!). Anyone who is hungry I want to feed them. Since I can't carry perishables around with me, I routinely hand off canned food to friends, family, and co-workers. Matt teases me that the only reason I make so many jars of jam, salsa, etc. is so that I can give it away. So the good news for all of you is that I will be sharing these recipes and in turn you can share the food too! You don't have to share, but if you make big batches like me, please hand off at least 1 jar to a friend, a family member, or co-worker and share the joy. You would not believe what fun it is to give this stuff away! The smiles and joy you can provide are just out of this world!

Now, this is my favorite salsa recipe, you can eat it right away or can it the way we did. One of the reasons I love this salsa is because it is not very labor intensive (minus the tomato grilling) and you don't have to remove the seeds. Ugh! That is the worst chore about tomato sauce and salsas! Seed removal! Why is it so bad? Because usually the tomatoes are hot and so you have to wait. Then after they cool, they're cold and slimy and that just grosses me out! Plus they're acidic so if you have cuts on your hands, OUCH! So with this recipe, you grill the 'maters, and toss them in with lots of other stuff and hit go on the food processor! Voila! Ready to heat and can!

Salsa ready to go! All we need are some nice tortilla chips OR a taco!
The recipe below makes 4 cups (2 cups/pint) so that means you get 2 jars of salsa from this recipe. I don't believe in going small so I usually multiply everything by 10 just to make 20 jars :-) You can make as much or as little as you like, but its just as easy to do 10 batches as it is to do 1 batch. Also, I've made some mistakes and will point them out to you as I go, but mistakes and all it was DELICIOUS!

Ingredients:
1/2 Tbs Olive Oil
1/2 onion- peeled and chopped
2 lbs of Roma tomatoes - Grilled/blackened
4 tsp. finely minced roasted garlic (I didn't use roasted and it was SUPER garlicky, roasted would make it more mellow)
1/2 c. minced cilantro leaves
4 chipotle chiles in adobo, chopped
1/4 c. red wine vinegar
1 Tbs salt
1 tsp sugar
2 Tbs of lemon juice

Chop the tomatoes and onion


Grill the tomatoes until they are lightly blackened.
To cook all these tomatoes, it takes about 10 minutes to grill on a gas grill set to medium
No need to flip the tomatoes during grilling, leaving them on one side for ~10 minutes works just fine!

Watch out! Some will fall through the cracks so make a bit more than the recipe calls for!

Look at all those roasted 'maters!

Blackened roasted tomatoes!

Heat the olive oil in a saute pan over medium heat and add onion.


Saute onion until caramelized (about 10 minutes).

Transfer the onion, half the blackened tomatoes and garlic to a food processor and pulse until finely chopped but not pureed


Add the cilantro and chipotle chiles and pulse again to mix

MISTAKE!!! Used frozen cilantro and didn't like it so Matt ran to the store (God bless him!) and got me some fresh

Still looked good until I could add the fresh cilantro

Pulse the last of the tomatoes and mix everything together in a pot

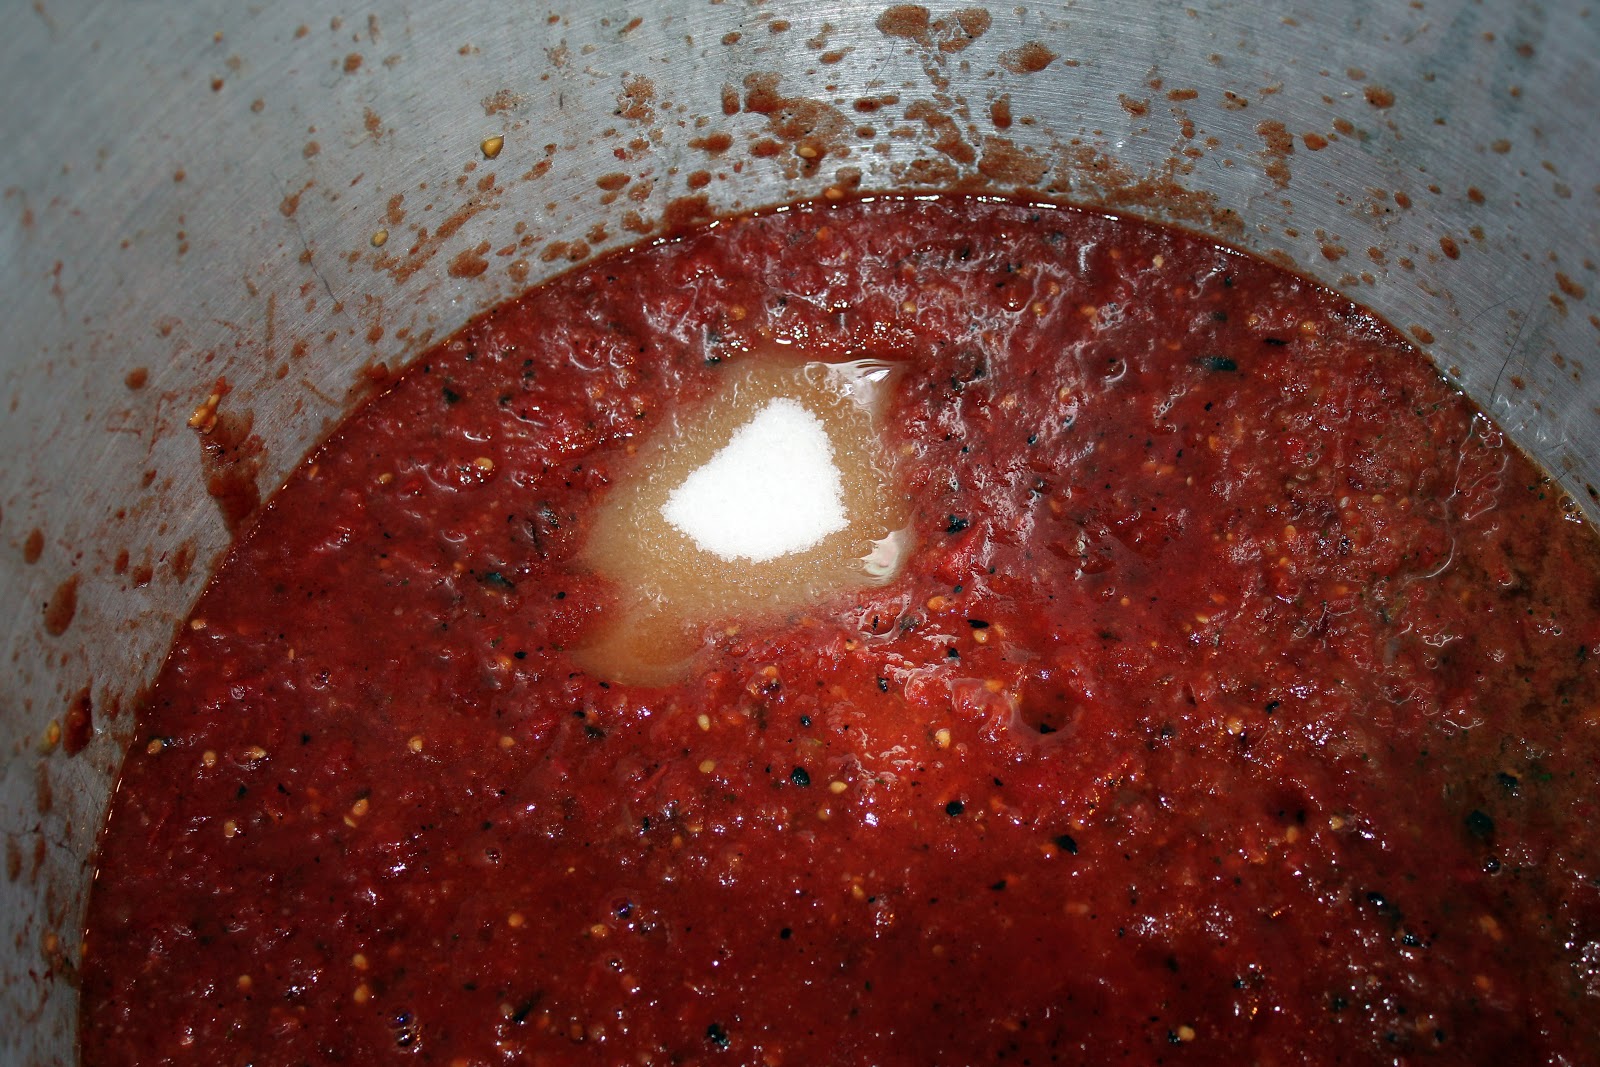
Add vinegar,  salt, and sugar


Sugar! I keep mine in a jar on the counter, so there isn't a sugar bag to show.

Heat mixture to a boil and allow to boil for 10 minutes.
While mixture is boiling,  put 1 Tbs of lemon juice into each pint jar

 Ladle salsa into jars. BE SURE TO LEAVE 1/2 INCH HEAD ROOM IN THE JAR BEFORE PUTTING THE LID ON, and process for 35 minutes in a water bath.

Set jars aside and let cool. If the lids suck in (they don't pop when you touch them) then the salsa is shelf stable for at least 6 months unopened. Once the salsa is open it will keep for 2 weeks in the refrigerator.
 Alright! Now you know my salsa secret! This is a HUGE hit at parties and if you want to make a dip, you can mix 1 pint with 8 oz of cream cheese and toss in some cheddar cheese if you want. YUM YUM! I have been making this salsa now for 5 years and every year I run out before the next batch can be made. Another interesting thing about canned salsa is the longer you let it sit on a shelf, the hotter the salsa gets, so keep this in mind when you make this. Also, you can add more chipotles if you want it hotter now, but the smokey garlicky flavor is so great everyone will want more.

I hope you enjoy this recipe and as always, Happy eating!


Sunday, 7 October 2012

Melt in your mouth chicken

Hello all!
Ever make a meal and it looks like something a critter might have regurgitated but is smells so good you have to eat it, and find out that it was well worth it? Well, if not, you really have to try this recipe! It was so delicious and easy, but looked a bit off. Don't let those looks fool you, it is fantastic! I'm really glad I made this recipe because mine did not look a DARN think like the pin. I have a feeling that no one else has had theirs come out like the picture but the flavor was so good no one complained. Ok Ok, I am exaggerating a bit, it doesn't look like vomit, but it does not look like the crispy crumbly thing on the pin. I have no idea how they got it to look like that, but mine came out nice and creamy so it looked more like chicken with a fettuccine sauce on it rather than crispy.

Enough about looks, the flavor was really nice and it had very little hands on prep time, and a baking time of up to 45 minutes. I used thinner chicken breast so my thermometer reached 165F much quicker (25 minutes) so keep that in mind when you make this dish. Remember: The remote meat thermometer is your friend! The other thing is the link to the recipe is not the recipe that was on the pin! So I combined the two and it was fantastic! SOOO yummy! Great for company because of the short hands on time and the rest in the oven. I served it over multi-grain rice, but you could serve it over fettuccine or julienne zucchini (quick sauteed with olive oil).  

Here is the original link:
http://www.food.com/recipe/melt-in-your-mouth-chicken-breast-37336

And now my own version of:
Melt in your mouth chicken

6 boneless chicken breast halves (mine were thin)
1/4 c. mayonnaise
3/4 c. fat-free plain Greek yogurt
1/2 c. freshly grated Parmesan cheese (or cheese blend)
1 1/2 tsp seasoning salt
1/2 tsp ground black pepper
1 tsp garlic powder
 
Mix mayonnaise, Greek yogurt, cheese and seasonings

Mayo + Greek yogurt


Garlic, season salt (didn't have Lowery's, but its great!) and used seasoning pepper which is just course ground pepper with a bit of hot pepper mixed in. Plain pepper worked just as well if that is all you have. BE CREATIVE!


Spread mixture over chicken breast and place in baking dish.

Bake at 375°F for 45 minutes.
TaDa! There are some juices in the bottom of the pan which were delicious over the rice, but again it didn't look that great when dishing it out. So if you make if for company, have everyone sit down and bring them a plate with the food on it. ;-)
------------------------------------------------------------
The recipe on the pin used only Greek yogurt, the original recipe only had Mayo. I was concerned that there wouldn't be enough oil if I only used Greek yogurt, so I added the small amount of light mayo. It was great! The flavor was really nice and I would recommend this one to anyone! If you can't get the Trader Joe's cheese blend it's OK. Using just plain Parmesan was just as good!
Happy Eating!!

Saturday, 6 October 2012

Wild Turkey Breast Strips

Hello Dear Readers!
Today I have a very special treat, I guest blogger! Christine Mais is a super busy mom whose husband is an avid hunter. This means that Christine has to get extra creative when Rodney brings home something less than traditional. This also means she gets to create some amazing meals using these non-traditional (well actually they are the most traditional proteins since we were hunters before farmers...) protein sources. So a bit back Christine contacted me and asked if I'd like a guest blogger and I said, "YES!" especially because she was using hunted meat rather than something bought at the grocery store.  When you use meat you've hunted rather than bought at the store, you have to contend with some different hurdles than with store bought. These animals have not been fed a corn and soy based diet so they have a different flavor. Often because the animal is older than what you'd find at the store (8 weeks for chicken, 14-16 weeks for turkeys) so they may be a bit tough. They are also often leaner because of their diet which can contribute to toughness, but you can always get around this, just like Christine did in this recipe.
My dad brought a turkey home one year and it was the last year because he didn't want to ever pluck a turkey again. From what I understand if you're just going for the meat you can skin the bird just like you would a fish, or other game and avoid the whole plucking thing all together. I'm also pretty sure my mother's refusal to cook anything he brought in also contributed to him not doing it again. Luckily I learned how to cook early on and became the queen of the venison roast in no time flat. There was something about Mom not wanting to cook Bambi, I never got (it was YUMMY!) so Dad was happy to let me do all the cooking when he brought a deer home.

Christine was kind enough to provide me with her backstory, recipe, pictures, and a final verdict, so I am going to just paste what she sent below so you can get an idea of what an amazing person and chef she is! Enjoy and feel free to giggle along, she's got a great sense of humor to top it all off. Also, if you are not married to a hunter, you can find Turkey breasts at the store and use them.

Wild Turkey Strips 
by Christine Mais


Backstory:
I am an everyday wife and mom with a full time job, and little extra free time.  So, even though I serve balanced meals, cooking is often quick and minimal in my house.  To complicate things, my husband enjoys hunting.  Great, but, like I mentioned before, I am not much of a cook.  So… I wind up with a bunch of game in the freezer that I have no idea how to use!  I am hoping to be able to share a couple of successful cooking attempts with Jennifer and her friends.  Hmmm… I will probably pass along a few what not to do’s as well, purely based on my past experience ; )  Enjoy!

Marinated and Fried Turkey Strips
What I had to use:
·         Wild Turkey Breasts

What else I had that made it taste good:
·         White wine (1/2 cup)
·         Vinegar (1/2 cup)
·         Italian dressing (1/2 cup)
·         Lemon juice (add to taste)
·         Eggs (2 large)
·         Flour
·         Bread crumbs
·         Seasoning as desired
·         Vegetable oil

 Steps:
1.       Tenderize the meat!!!  Wild turkey can be very tough depending upon how old the bird is.  I skipped this last year and lived to regret it… see I told you I would have a what not to do!  A meat tenderizer is great for this step. But if you don’t have one on hand, use a roller over the meat in a plastic bag.  The plastic bag will prevent a mess.

2.       Cut the breast meat in strips cross grain.  (I had more than what is pictured here.)


3.       Prepare the marinade.  Mix together the white wine, the vinegar, the Italian dressing and lemon juice in a bowl.  Mix well.  If this is not enough marinade, add more accordingly.

4.       Place the strips in the marinade.  Let sit overnight or as long as you can.  Marinating from morning through the day is enough for flavor at dinner.


5.       Break the eggs for coating the strips.
6.       Mix flour and bread crumbs and seasoning (I used savory) for coating the strips.
7.       Set up the breading line.

8.       Put oil in the frying pan and pre-heat.
9.       Coat each strip with egg, then the flour and bread crumb mix, and then into the frying pan.

10.   Flip to fry each side.  Remove when the chicken is cooked all the way through.


My kids loved this!  Okay, so no one actually stood up and sung my praises after dinner, but I attribute that to completely full mouths, and complaints only when there were not any left over.  But perhaps the biggest non-verbal complement was from my youngest. After eating four strips, he asked for more.  I placed a small to medium size strip on his plate.  He looked at what I gave him; decided that wasn’t good enough, and stood up to get the biggest remaining strip on the serving plate.  Love that kid!
I hope you enjoy it too!
 ------
Wasn't this great?!?
Matt and I are going deer hunting this year and I'm hoping I'll be able to share some more game recipes with you all later this year. If not, I'll be happy to rely on Christine and her innovative game recipes!
Happy eating!

Sunday, 30 September 2012

Savory Cheddar Thyme Cornbread

Hi All!

This recipe was delicious! I wish it could be used as a main dish because it was so tasty and full of flavor...Oh wait, I did have it as a main dish when I found out I couldn't swallow the cold Tilapia! Boy was it good! Since the recipe calls for a whole stick of butter I couldn't bring myself to add more butter to it, but that would have been heavenly! Matt thought this was amazing and snacked on it for days until Clifford our Weimeraner decided to counter surf when we were not home and finished the pan off for us. We're starting to think we should probably put most baked goods up higher because Clifford is a carb hound. If its bread, bread based or even just a baked good, he is all over it!

Let me tell you too that Clifford is 13 years old. Most dogs of his breed only last until 12 so goes to show you scarfing an occasional loaf of bread of 1/4 pan of cornbread can't be too bad for you! About 4 years ago Matt made toast for himself for breakfast but didn't put the bread up. We came home to a happy dog and an empty ripped open bread bag. That night we went out and bought a whole new loaf of bread. Next day Matt did the same thing and left the bread out, though he pushed it all the way to the back of the counter. Nothing deters a determined Weimeraner! Clifford got the bag and proceeded to eat the whole loaf, again. Moral of the story, don't have dogs whose nose is the same height as the counter when they lift their heads up. The second moral of the story is counter surfing may prolong your dogs life, haha!

Enough stories and onto this fantastic recipe! Here is the original link:
http://www.onceuponachef.com/2010/02/savory-cornbread-with-cheddar-thyme.html

I did not use fresh thyme because I wanted to see if dried would work just in case I make this in the dead of winter when there is no fresh thyme to be found. Annnnndddd....It worked just fine! This would be really good paired with a hearty stew, some chili (though you may want to take out the thyme for that...) or the best would be with some fresh venison!

Savory Cheddar Thyme Cornbread

Ingredients:
1 ½ cups unbleached all-purpose flour
1 cup yellow cornmeal
1 tablespoon baking powder
1 ¼ teaspoons salt
2 ½ tablespoons sugar
2 teaspoons dried thyme, finely chopped
¾ cup frozen corn (no need to thaw, just be sure kernels are not stuck together)
1 cup freshly grated white sharp Cheddar cheese (I used Trader Joe's Unexpected cheddar)
1 ¼ cup milk (I use skim)
2 large eggs
1 stick (8 Tbs)  unsalted butter, melted and slightly cooled

  Preheat oven to 400 degrees and adjust rack to middle position. Spray a 9-inch glass or metal baking dish with nonstick cooking spray.


 In a large bowl, whisk flour, cornmeal, baking powder, salt, sugar and thyme until well combined.


Sugar! Although you can do without adding sugar it really makes it taste nice!


Stir in corn and cheese.


Make wet mixture: In a small bowl, break up eggs with a wire whisk, then add milk and whisk to combine.


Add wet mixture and melted butter to dry ingredients and stir with a wooden spoon or rubber spatula until just combined. Do not over mix.


Budda (aka butter)
This needs to be stirred more!
Pour batter into prepared baking dish and smooth surface with back of spoon or spatula.


Bake for about 30 minutes, or until puffed and lightly golden.


Cool slightly in pan on wire rack. Cut into pieces and serve warm.
YUM! Eat it warm and you'll be in heaven!
Well, as promised, here is the recipe for the Savory Thyme and Cheddar Cornbread and it was fabulous! Just the right consistency (just a bit crumbly but still moist).  And it will be a welcome addition to any meal this winter when I need a bit of comfort food or a great addition to a Stout stew.
Happy eating!