Monday, 15 October 2012

Pumpkin spiced toffee

Hello!
Hope you enjoyed yesterday's foray into salsa, we'll be repeating it with a different recipe in the near future. In the mean time I want to share a treat with you that is very easy, doesn't require many ingredients and everyone will think you're an amazing chef when you bring it to work or to a social gathering. This is something I've come up with all my own, though I'm sure there are other recipes out there because this is too yummy for no one to have thought of yet.
Last year around this time Matt and I made a trip up to Pennsylvania just for giggles and I found not only my families historical home (sadly closed by the time we got there...), a silly town called Intercourse,  but also some really nice Amish shops. Many of these are commercialized so I'm not sure how authentic they were, but they had some amazing treats! One of the delicious snacks I brought home was a pumpkin spiced brittle. It was fabulous but the more I looked into brittle the less I wanted to make it. The other part of this story comes from about 5 years ago when I got into making caramel to go over a delicious flourless chocolate cake I make. One day I got distracted and didn't put the cream in and instead of caramel I got toffee! Hello serendipity! To complement this, I started pouring it over Dole coco-covered almonds. Talk about YUM! You can still do this using just the toffee recipe without the spices (or with...) or the pepitas (aka pumpkin seeds).

To sum up, this recipe is the marriage between a delicious treat from the Amish and me being blonde and not paying attention. It takes maybe 20 minutes to make so its super speedy and great to share!


Ingredients:
1 1/2 c. Sugar
6 Tbs Butter
1/2 tsp Cinnamon
1/2 tsp Pumpkin pie spice
1/4-1/2 c. pepitas (pumpkin seeds)

Line a cookie sheet with foil and spray with Pam (or any other non-stick spray)

Place sugar in a sauce pan and heat on medium-high stirring constantly until the sugar has caramelized and is a bubbly liquid.
Plain white sugar in a big pot.  you want a fair amount of head room because it will bubble up when you add the butter

I like using a wooden spoon because unlike metal, it does not conduct heat so you do  not get uneven heating

The sugar is getting kind of clumpy here and you'll see some melted sugar on the bottom

More clumps. It starts to look like rock candy around this point. Keep stirring!

Some of the chunks are getting brown, so the sugar is beginning to caramelize

Now it really looks like rock candy. Getting closer!

Starting to melt more and bubble

Liquid with chunks

Looks like my chunky apple sauce, almost melted!

Only a few chunks left

Melted AND caramelized!

Add in the butter and stir until incorperated


Bubble bubble toil and trouble...

Add in Cinnamon and Pumpkin pie spice and stir until incorporated


Pour toffee onto foil lined cookie sheet and sprinkle pumpkin seeds on top. Use a spatula to incorporate them into the toffee if you'd like.


Once the toffee has cooled, whack it on a table a few times to break it up or break pieces apart by hand.


Pretty easy, huh? And so darn tasty! Its one of those recipes that is very simple, has few ingredients but is a really great crowd pleaser. I was looking online and supposedly you can melt the butter and sugar together at the same time (they did 1 c. sugar to 1 c. butter) and cook it until the sugar has caramelized and the temp reaches ~300 F. You're welcome to try that way as well with their ratios of sugar and butter, but my way doesn't require a candy thermometer. So it all depends on how precise you want to make your toffee. Either way you decide, do try this and share! It's good by itself, or you can crunch it up and serve it over a nice salad (like the candied walnuts or pecans in a strawberry salad) for Thanksgiving dinner.
Happy eating!

Sunday, 14 October 2012

Fire Roasted Tomato Salsa

Hello All!!!
I have been doing so much cooking that I haven't had time to blog! Let me tell you, I have so much to share ya'll are going to flip! We have canned tons of salsa, tomato sauce, and apple sauce, we're stocked up for winter, or until I give it all away. If I haven't told you all this already I LOVE TO SHARE FOOD! If I had it my way I'd pack a whole plane with food and visit every hungry village in the world and give them food. When I see homeless I want to give them a good meal, when I see starving undergrads, I want to give them a good meal (or load them up with cookies which are just as good as a nice meal!). Anyone who is hungry I want to feed them. Since I can't carry perishables around with me, I routinely hand off canned food to friends, family, and co-workers. Matt teases me that the only reason I make so many jars of jam, salsa, etc. is so that I can give it away. So the good news for all of you is that I will be sharing these recipes and in turn you can share the food too! You don't have to share, but if you make big batches like me, please hand off at least 1 jar to a friend, a family member, or co-worker and share the joy. You would not believe what fun it is to give this stuff away! The smiles and joy you can provide are just out of this world!

Now, this is my favorite salsa recipe, you can eat it right away or can it the way we did. One of the reasons I love this salsa is because it is not very labor intensive (minus the tomato grilling) and you don't have to remove the seeds. Ugh! That is the worst chore about tomato sauce and salsas! Seed removal! Why is it so bad? Because usually the tomatoes are hot and so you have to wait. Then after they cool, they're cold and slimy and that just grosses me out! Plus they're acidic so if you have cuts on your hands, OUCH! So with this recipe, you grill the 'maters, and toss them in with lots of other stuff and hit go on the food processor! Voila! Ready to heat and can!

Salsa ready to go! All we need are some nice tortilla chips OR a taco!
The recipe below makes 4 cups (2 cups/pint) so that means you get 2 jars of salsa from this recipe. I don't believe in going small so I usually multiply everything by 10 just to make 20 jars :-) You can make as much or as little as you like, but its just as easy to do 10 batches as it is to do 1 batch. Also, I've made some mistakes and will point them out to you as I go, but mistakes and all it was DELICIOUS!

Ingredients:
1/2 Tbs Olive Oil
1/2 onion- peeled and chopped
2 lbs of Roma tomatoes - Grilled/blackened
4 tsp. finely minced roasted garlic (I didn't use roasted and it was SUPER garlicky, roasted would make it more mellow)
1/2 c. minced cilantro leaves
4 chipotle chiles in adobo, chopped
1/4 c. red wine vinegar
1 Tbs salt
1 tsp sugar
2 Tbs of lemon juice

Chop the tomatoes and onion


Grill the tomatoes until they are lightly blackened.
To cook all these tomatoes, it takes about 10 minutes to grill on a gas grill set to medium
No need to flip the tomatoes during grilling, leaving them on one side for ~10 minutes works just fine!

Watch out! Some will fall through the cracks so make a bit more than the recipe calls for!

Look at all those roasted 'maters!

Blackened roasted tomatoes!

Heat the olive oil in a saute pan over medium heat and add onion.


Saute onion until caramelized (about 10 minutes).

Transfer the onion, half the blackened tomatoes and garlic to a food processor and pulse until finely chopped but not pureed


Add the cilantro and chipotle chiles and pulse again to mix

MISTAKE!!! Used frozen cilantro and didn't like it so Matt ran to the store (God bless him!) and got me some fresh

Still looked good until I could add the fresh cilantro

Pulse the last of the tomatoes and mix everything together in a pot

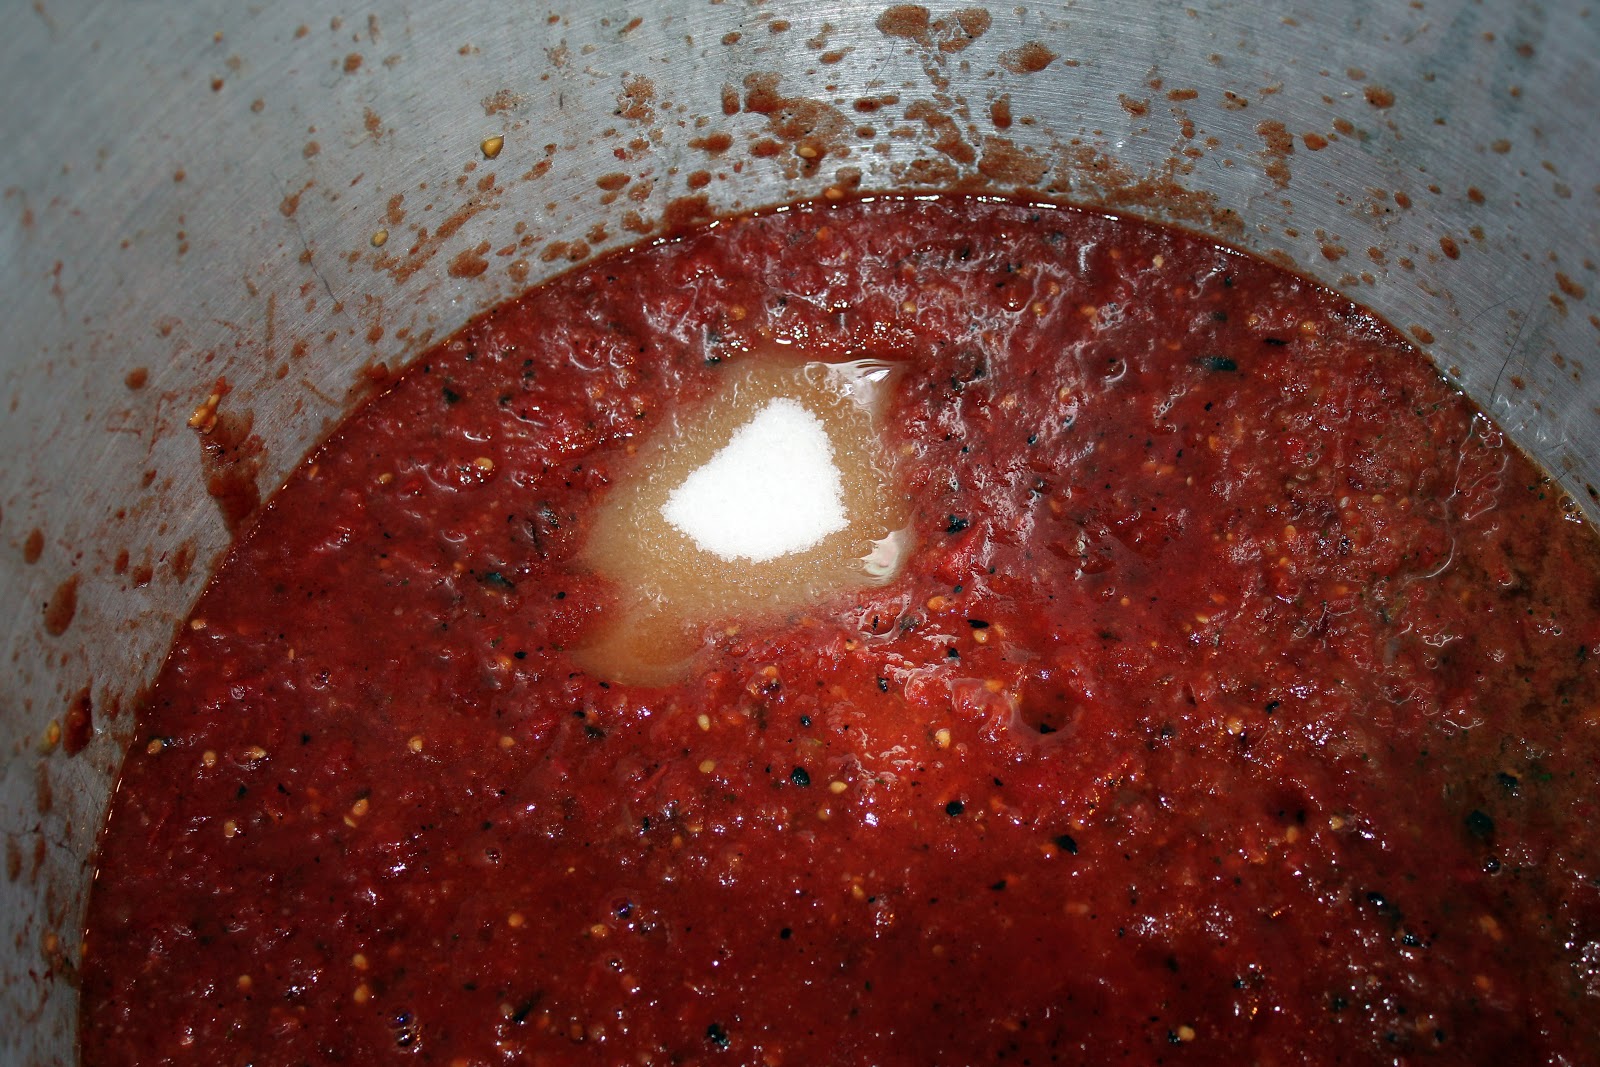
Add vinegar,  salt, and sugar


Sugar! I keep mine in a jar on the counter, so there isn't a sugar bag to show.

Heat mixture to a boil and allow to boil for 10 minutes.
While mixture is boiling,  put 1 Tbs of lemon juice into each pint jar

 Ladle salsa into jars. BE SURE TO LEAVE 1/2 INCH HEAD ROOM IN THE JAR BEFORE PUTTING THE LID ON, and process for 35 minutes in a water bath.

Set jars aside and let cool. If the lids suck in (they don't pop when you touch them) then the salsa is shelf stable for at least 6 months unopened. Once the salsa is open it will keep for 2 weeks in the refrigerator.
 Alright! Now you know my salsa secret! This is a HUGE hit at parties and if you want to make a dip, you can mix 1 pint with 8 oz of cream cheese and toss in some cheddar cheese if you want. YUM YUM! I have been making this salsa now for 5 years and every year I run out before the next batch can be made. Another interesting thing about canned salsa is the longer you let it sit on a shelf, the hotter the salsa gets, so keep this in mind when you make this. Also, you can add more chipotles if you want it hotter now, but the smokey garlicky flavor is so great everyone will want more.

I hope you enjoy this recipe and as always, Happy eating!


Sunday, 7 October 2012

Melt in your mouth chicken

Hello all!
Ever make a meal and it looks like something a critter might have regurgitated but is smells so good you have to eat it, and find out that it was well worth it? Well, if not, you really have to try this recipe! It was so delicious and easy, but looked a bit off. Don't let those looks fool you, it is fantastic! I'm really glad I made this recipe because mine did not look a DARN think like the pin. I have a feeling that no one else has had theirs come out like the picture but the flavor was so good no one complained. Ok Ok, I am exaggerating a bit, it doesn't look like vomit, but it does not look like the crispy crumbly thing on the pin. I have no idea how they got it to look like that, but mine came out nice and creamy so it looked more like chicken with a fettuccine sauce on it rather than crispy.

Enough about looks, the flavor was really nice and it had very little hands on prep time, and a baking time of up to 45 minutes. I used thinner chicken breast so my thermometer reached 165F much quicker (25 minutes) so keep that in mind when you make this dish. Remember: The remote meat thermometer is your friend! The other thing is the link to the recipe is not the recipe that was on the pin! So I combined the two and it was fantastic! SOOO yummy! Great for company because of the short hands on time and the rest in the oven. I served it over multi-grain rice, but you could serve it over fettuccine or julienne zucchini (quick sauteed with olive oil).  

Here is the original link:
http://www.food.com/recipe/melt-in-your-mouth-chicken-breast-37336

And now my own version of:
Melt in your mouth chicken

6 boneless chicken breast halves (mine were thin)
1/4 c. mayonnaise
3/4 c. fat-free plain Greek yogurt
1/2 c. freshly grated Parmesan cheese (or cheese blend)
1 1/2 tsp seasoning salt
1/2 tsp ground black pepper
1 tsp garlic powder
 
Mix mayonnaise, Greek yogurt, cheese and seasonings

Mayo + Greek yogurt


Garlic, season salt (didn't have Lowery's, but its great!) and used seasoning pepper which is just course ground pepper with a bit of hot pepper mixed in. Plain pepper worked just as well if that is all you have. BE CREATIVE!


Spread mixture over chicken breast and place in baking dish.

Bake at 375°F for 45 minutes.
TaDa! There are some juices in the bottom of the pan which were delicious over the rice, but again it didn't look that great when dishing it out. So if you make if for company, have everyone sit down and bring them a plate with the food on it. ;-)
------------------------------------------------------------
The recipe on the pin used only Greek yogurt, the original recipe only had Mayo. I was concerned that there wouldn't be enough oil if I only used Greek yogurt, so I added the small amount of light mayo. It was great! The flavor was really nice and I would recommend this one to anyone! If you can't get the Trader Joe's cheese blend it's OK. Using just plain Parmesan was just as good!
Happy Eating!!